In 2.008, Design for Manufacturing II, students work in teams to create 50 identical yo-yos, primarily using injection molding and thermoforming. Through this process, I learned about several manufacturing methods an how to adjust parameters and troubleshoot when manufacturing is inconsistent. Below is my team's finished yo-yo. I primarily worked on the design (and especially DFM) of the yo-yo's top part, CAM toolpaths, and the overall design for assembly.
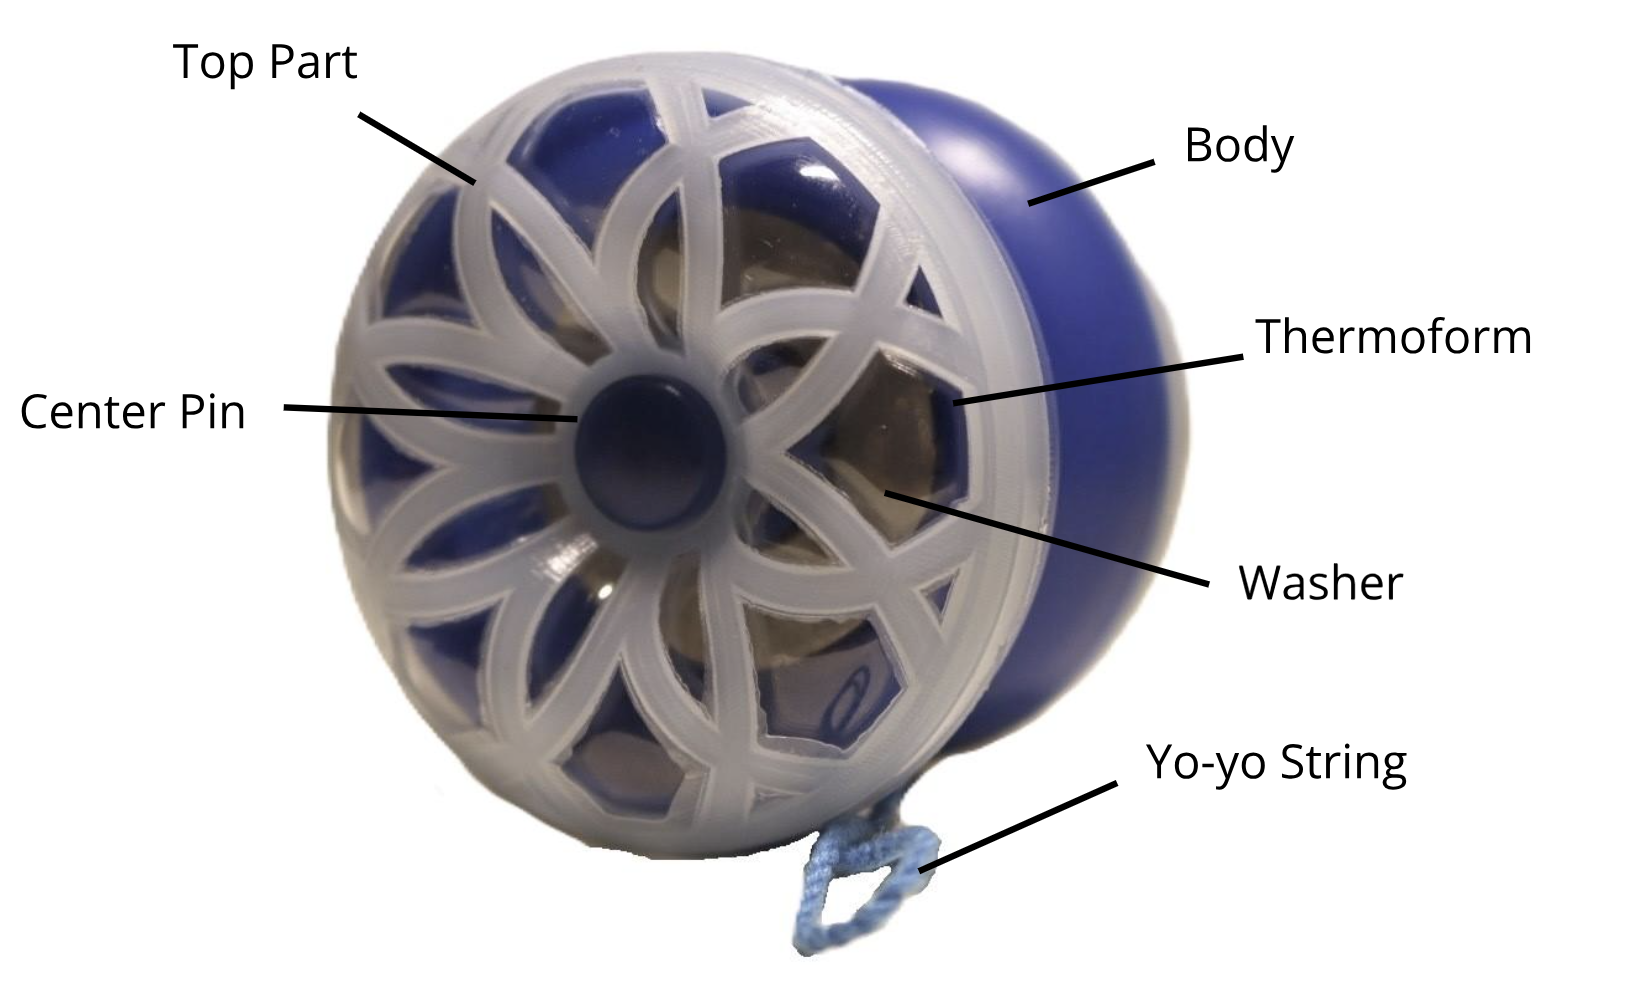
Finished yo-yo with labelled componenets.
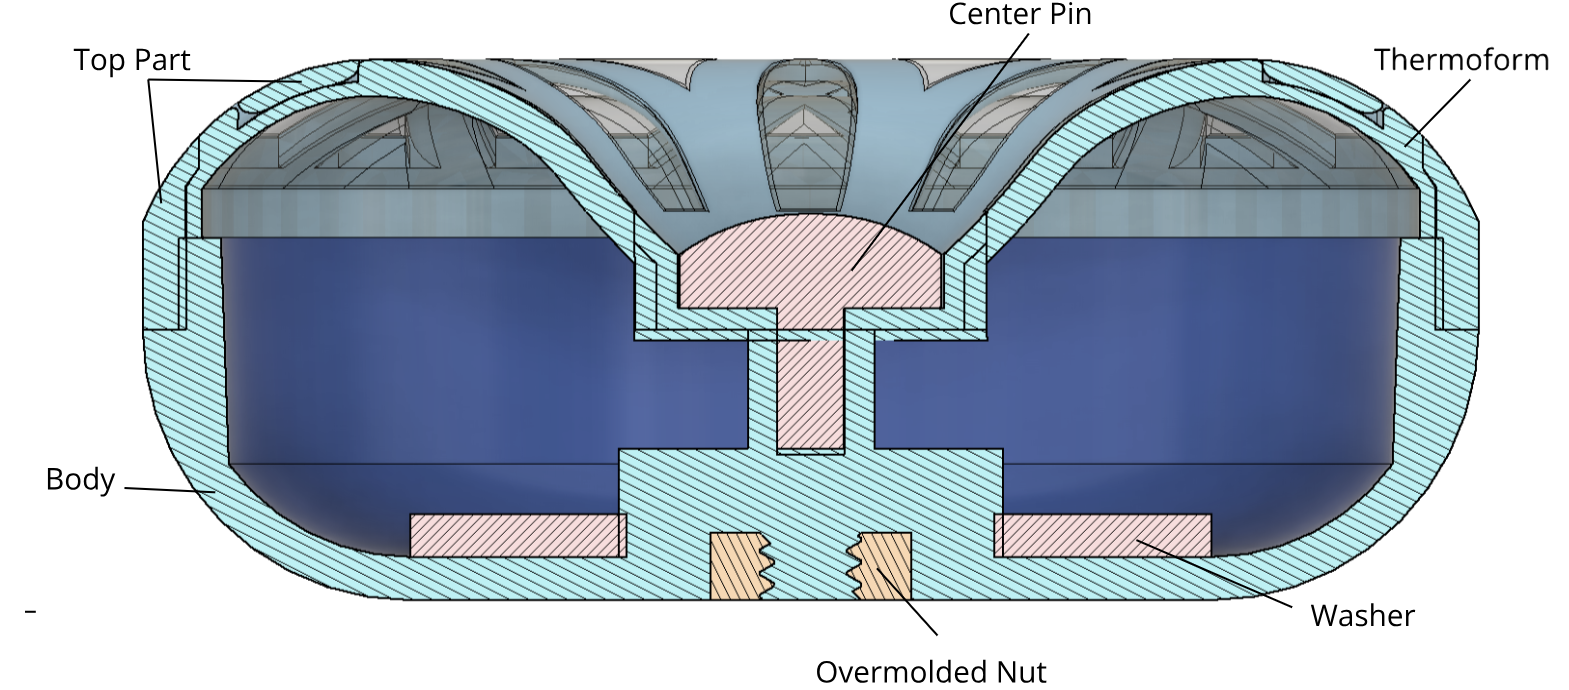
Cross-section view of yo-yo.
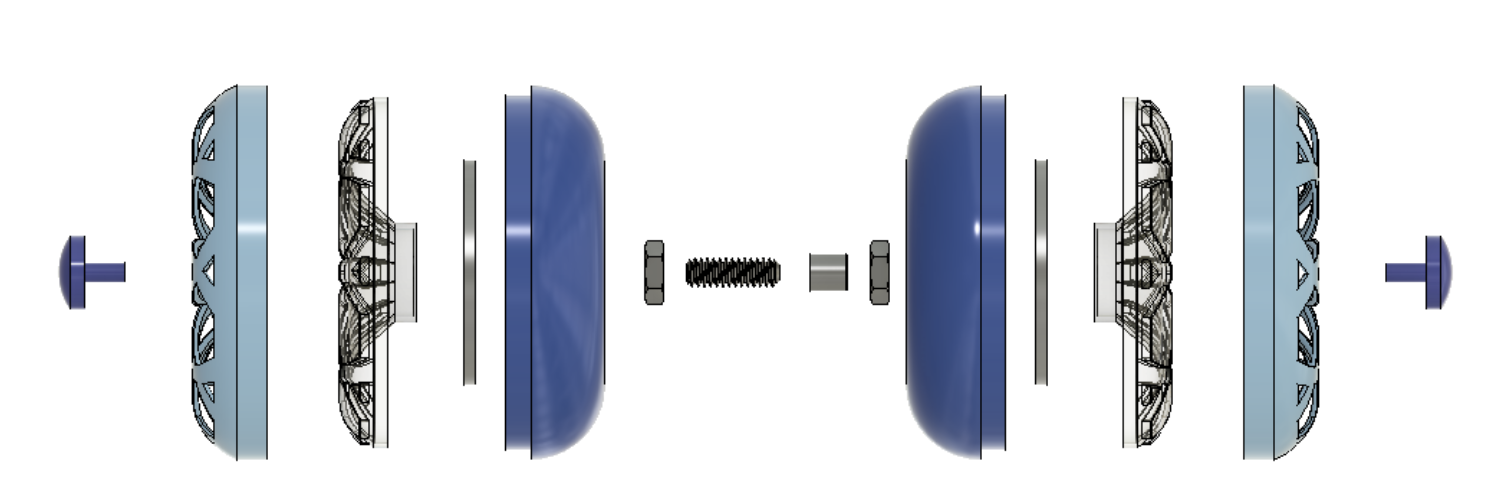
Exploded view of yo-yo.
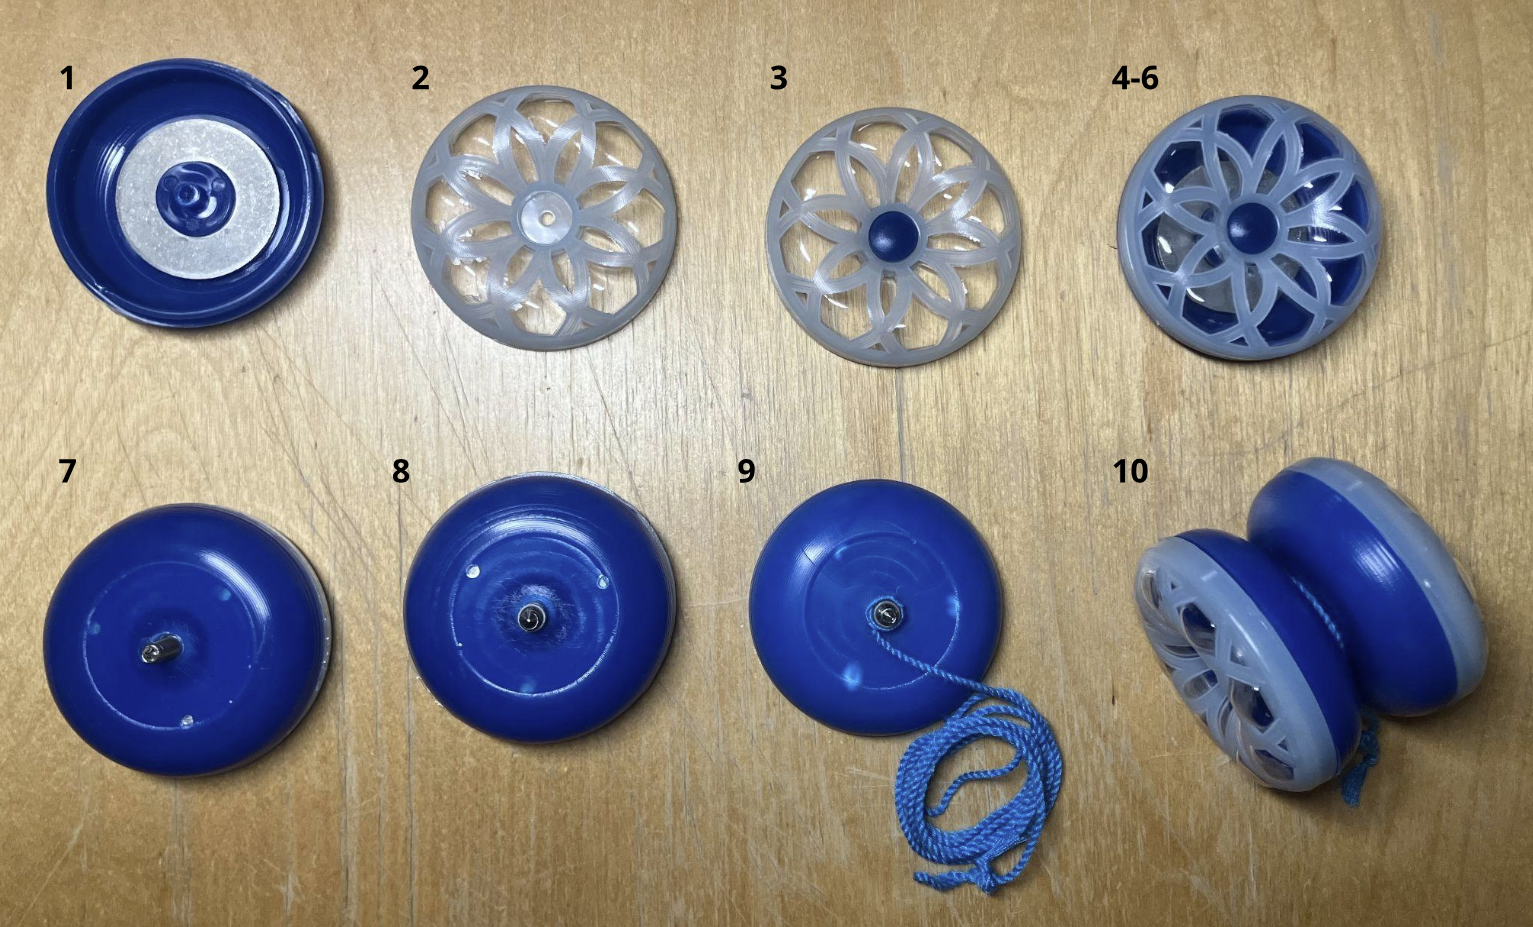
Below is an image showing the yo-yo assembly process. The steps are as follows:
1. Press the washer into the body.
2. Press the thermoformed part into the top part.
3. Insert the center pin through the top part and thermoformed part.
4. Press the top part onto the yo-yo body.
5. Fully insert the center pin into the yo-yo body.
6. Complete steps 1-5 for two yo-yo halves.
7. Screw the set screw into the overmolded nut on one yo-yo half.
8. Place the spacer over the set screw.
9. Loop the yo-yo string over the spacer.
10. Screw the two yo-yo halves together to complete the assembly.
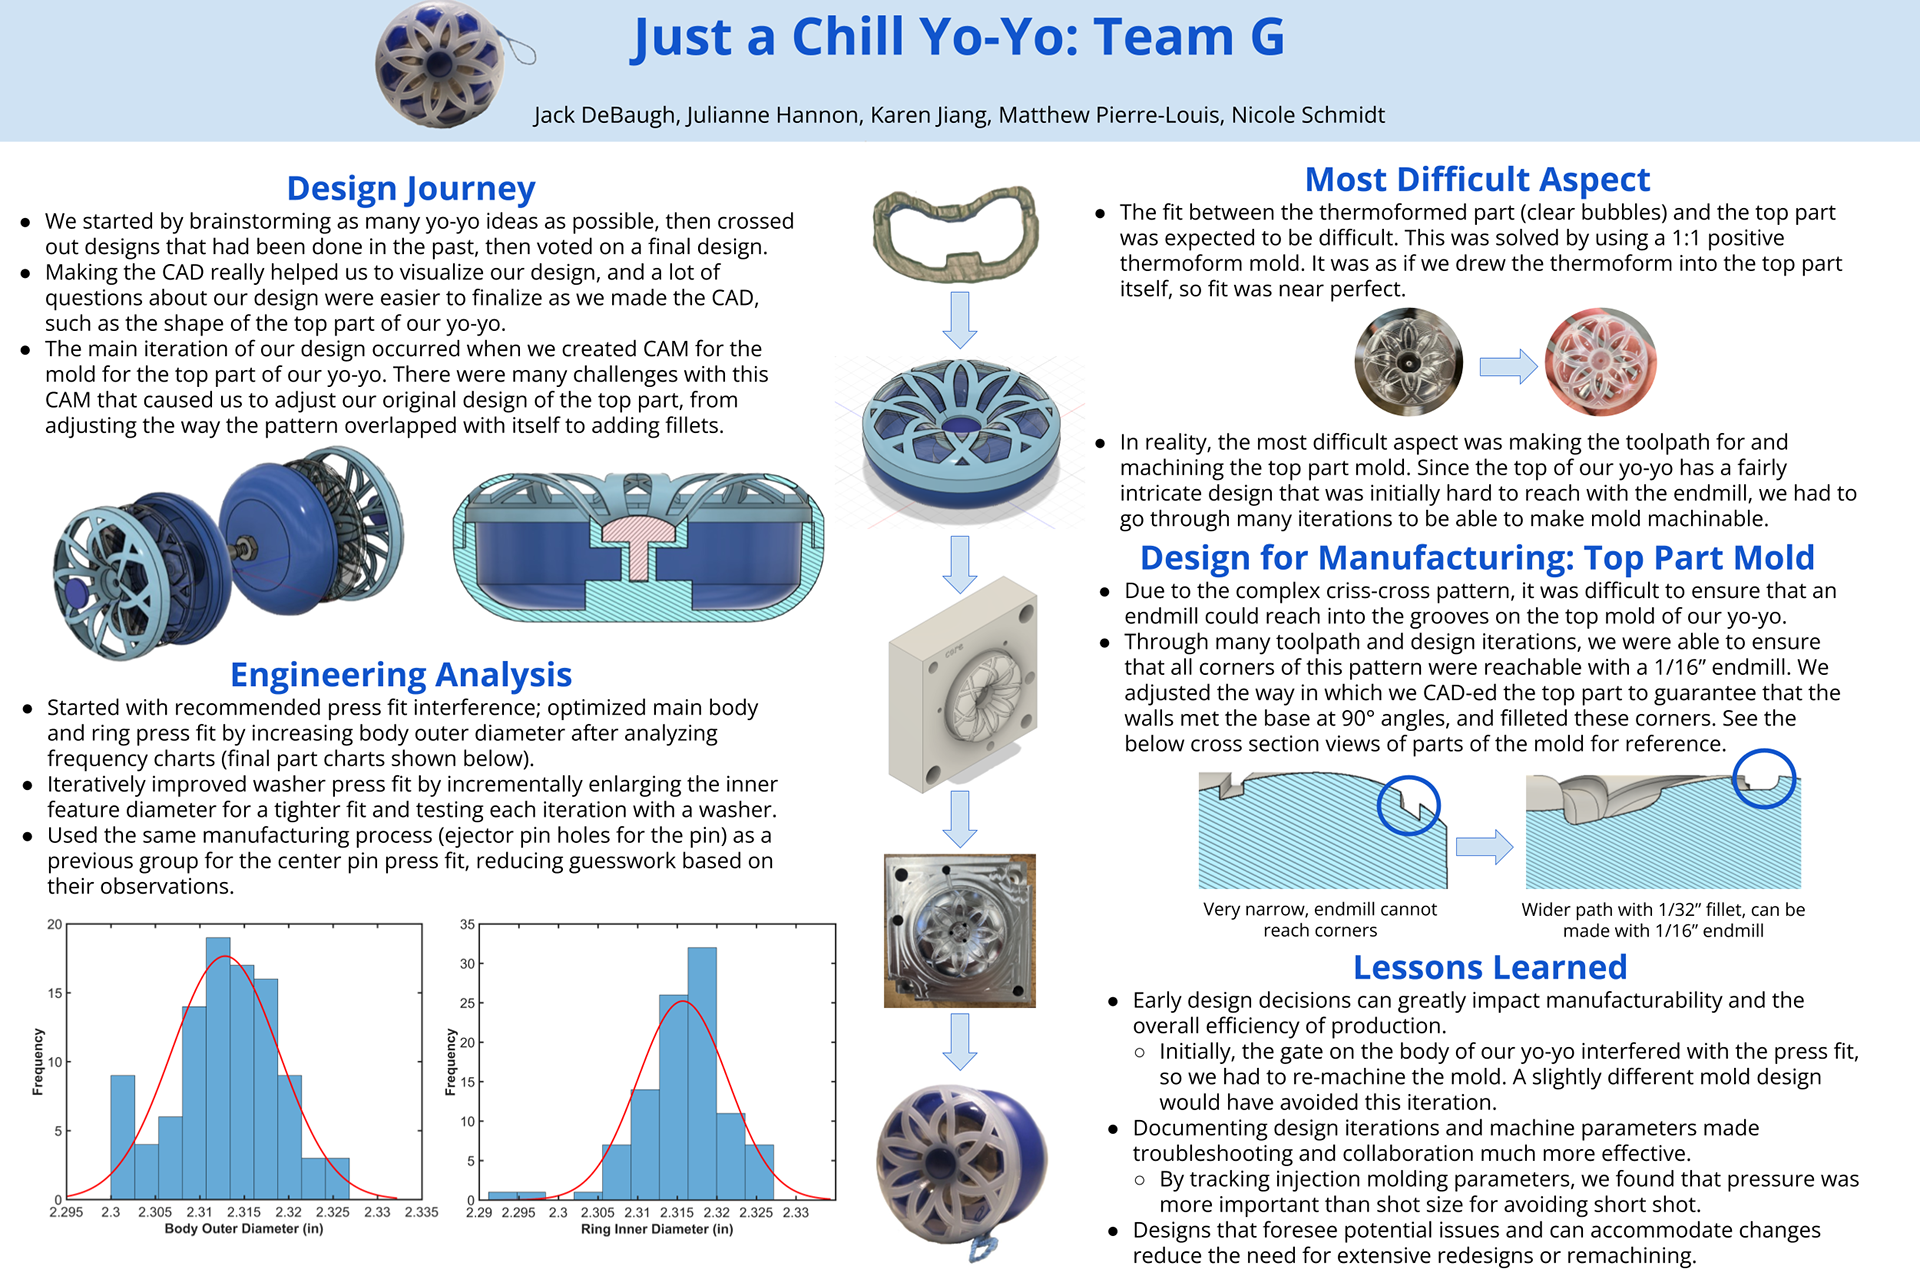
At the end of the semester, we created a poster to explain the design and manufacturing process, shown below.